Follow this step-by-step guide to winterize your pool the right way and keep it protected until next summer.
Summer is officially over, and though you may yet be having some early fall fun in your pool, it’ll be time to close it up for the season once the temperature is consistently staying under 65° F.
To ensure everything’s in ship shape for your next year’s Memorial Day bash, follow along with this step-by-step guide for properly winterizing your swimming pool.
1. Water Check
A week prior to starting in on the “winterization proper,” you’ll want to make sure your water’s chemical composition is in good shape. The alkalinity should measure between 80 and 50 ppm and calcium hardness between 175 and 275 ppm, with a pH in the range of 7.2 to 7.6.
2. Surface Cleaning
While a thorough cleaning is unlikely to be anyone’s favorite part of pool ownership, keep in mind that a properly winterized pool engenders a properly “summerized” pool. Scrub then vacuum all surfaces, get rid of accumulated algae/gunk, and snatch up any debris with your trusty skimmer net. Close out the process running a full pump cycle and then cleaning your filters with a chemical solution.
3. Water Treatment
Surely a familiar process by now, you’ll need to perform one final pool shock—that is, basically, an all-out chemical assault on your water—to eliminate all bacterial traces of a summer spent in the pool. Following this, give the chlorine level about a day to fall back within the 1-3 ppm range, then apply an algaecide; do so too soon and the two chemical processes will essentially negate each other. Once again, finish with a day-long pump run.
4. Accessory Removal and Storage
“Accessory” doesn’t just mean (e.g.) the wacky noodles and floating flamingo chairs… everything has to come out. Ladders, filters, hoses, heaters, etc. should all be removed, rinsed, and dried prior to indoor storage. A winterized pool is indeed an empty pool, with one notable exception…
5. Water Level Adjustment
…That exception being the water itself! It’s perfectly acceptable not to drain this at the close of pool season if you’ve taken the aforementioned steps. However, you’ll need to adjust the water levels depending on your pool type and local climate. For inground pools, you’ll want your water about six inches below the tile line if it’s likely to freeze over the winter, and completely full if not. For above-grounders, keep potentially-freezing water right at the skimming line (and be sure to insert an pillow to absorb the brunt of the freezing process); if there’s no chance for a freeze, then no real adjustment is required—and keep in mind that fully draining an above-ground pool can lead to its collapse.
6. Covering
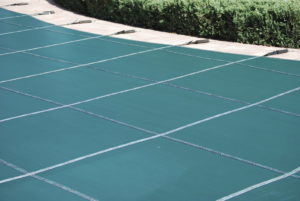
At last, we’ve reached the final step—covering your pool for the off-season. There are multiple covers choices available suiting a range of climates and offering different levels of protection. Mesh is fine for more moderate regions; it’ll keep out leaves and branches, but a blizzard’s worth of snow accumulation might prove… problematic. If you live in an area with more severe winters—or, crucially, if you have young children or pets prone to sudden urges for exploration—a solid cover is a necessity.
Contact Sunrise Premiere Pool Builders
Whether you want to make improvements to your current pool or you’re in the market for a new pool, Sunrise Premier Pool Builders is here to help create the perfect pool for you. Customizable pools and spas are just the beginning and we are more than happy to walk you through every step to choosing the perfect products for you and your family. If you’re ready to begin, contact us at 410-349-3852 or online. To see examples of our work look at our social media pages Facebook, Twitter, LinkedIn, Pinterest and Google+.
